vorrmkracht10 / filament-two-factor-auth
Requires
- php: ^8.1
- filament/filament: ^3.0
- filament/support: ^3.2
- laravel/fortify: ^1.24
- spatie/laravel-package-tools: ^1.15.0
Requires (Dev)
- laravel/pint: ^1.0
- nunomaduro/collision: ^7.9
- nunomaduro/larastan: ^2.0.1
- orchestra/testbench: ^8.0
- pestphp/pest: ^2.1
- pestphp/pest-plugin-arch: ^2.0
- pestphp/pest-plugin-laravel: ^2.0
- phpstan/extension-installer: ^1.1
- phpstan/phpstan-deprecation-rules: ^1.0
- phpstan/phpstan-phpunit: ^1.0
- dev-main
- v1.6.4
- v1.6.3
- v1.6.2
- v1.6.1
- v1.6.0
- v1.5.4
- v1.5.3
- v1.5.2
- v1.5.1
- v1.5.0
- v1.4.1
- v1.4.0
- v1.3.5
- v1.3.4
- v1.3.3
- v1.3.2
- v1.3.1
- v1.3.0
- v1.2.4
- v1.2.3
- v1.2.2
- v1.2.1
- v1.2.0
- v1.1.14
- v1.1.13
- v1.1.12
- v1.1.11
- v1.1.10
- v1.1.9
- v1.1.8
- v1.1.7
- v1.1.6
- v1.1.5
- v1.1.4
- v1.1.3
- v1.1.2
- v1.1.1
- v1.1.0
- v1.0.7
- v1.0.6
- v1.0.5
- v1.0.4
- v1.0.3
- v1.0.2
- v1.0.1
- v1.0.0
- dev-35-improvement-2fa-input
This package is auto-updated.
Last update: 2024-09-27 12:22:11 UTC
README
此包为您的 Laravel Filament 应用添加双因素认证,使用 Laravel Fortify 的第三方包。我们提供视图和逻辑,以在 Filament 应用中启用双因素认证(2FA)。可能的认证方法包括:
- 电子邮件
- 短信
- 认证器应用
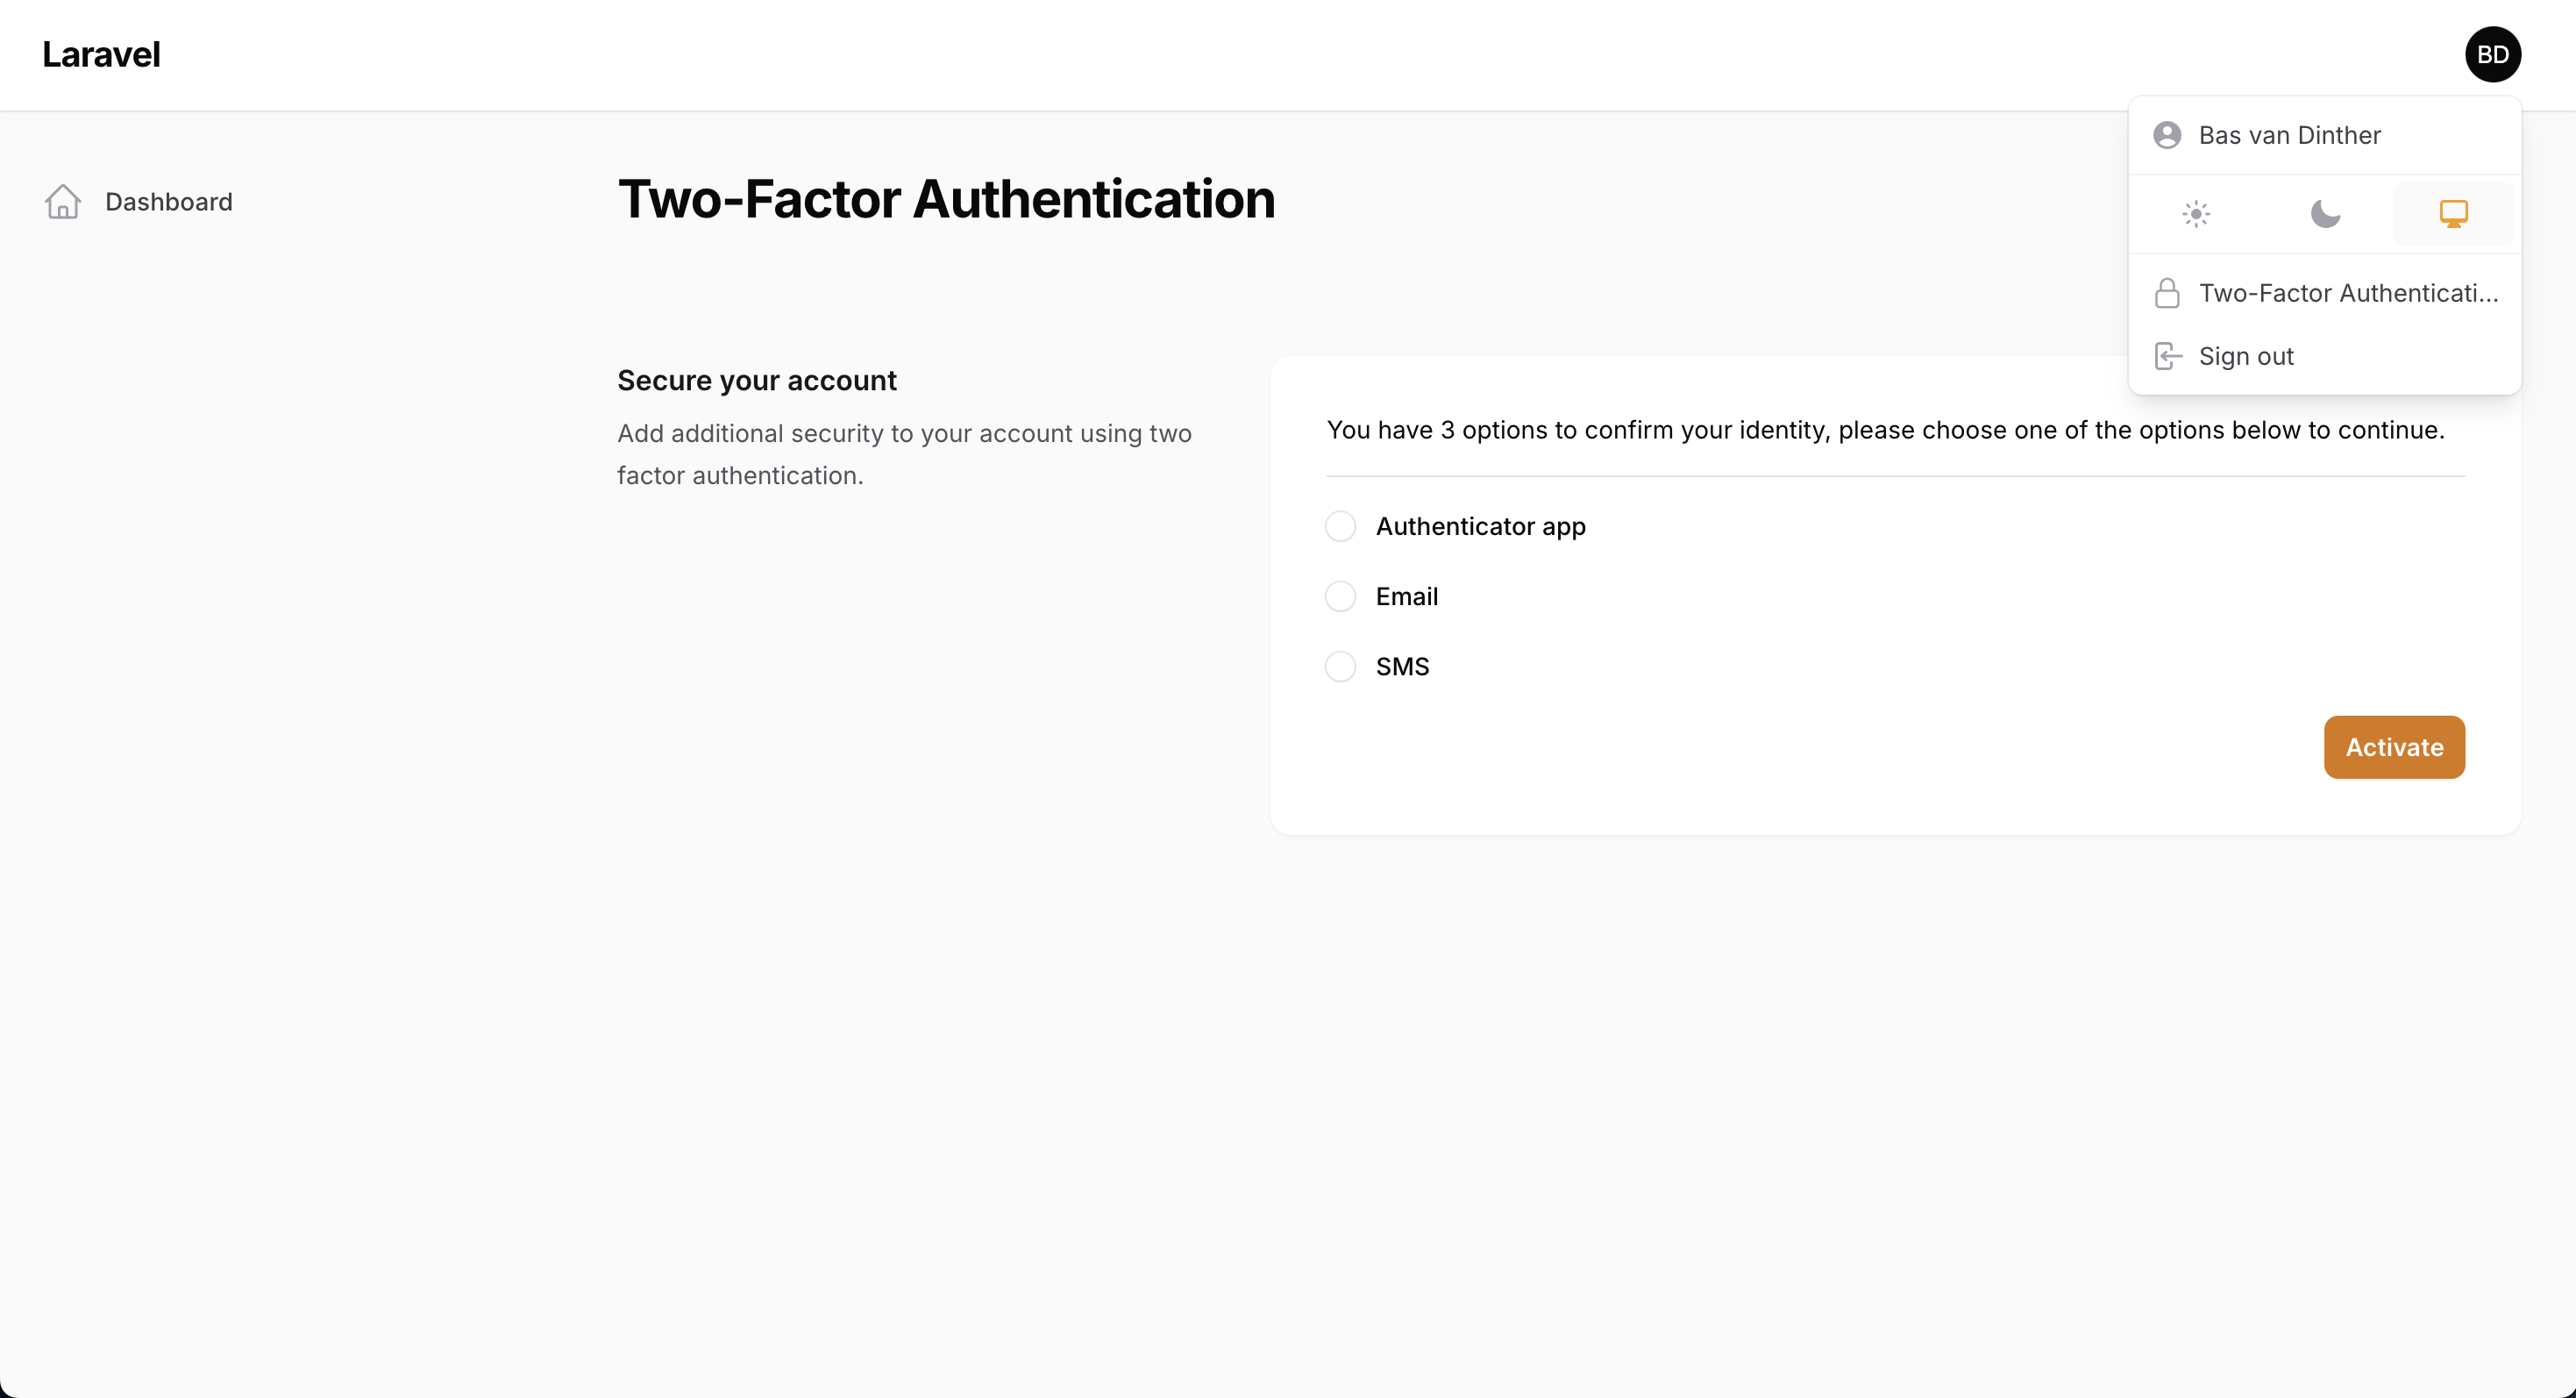
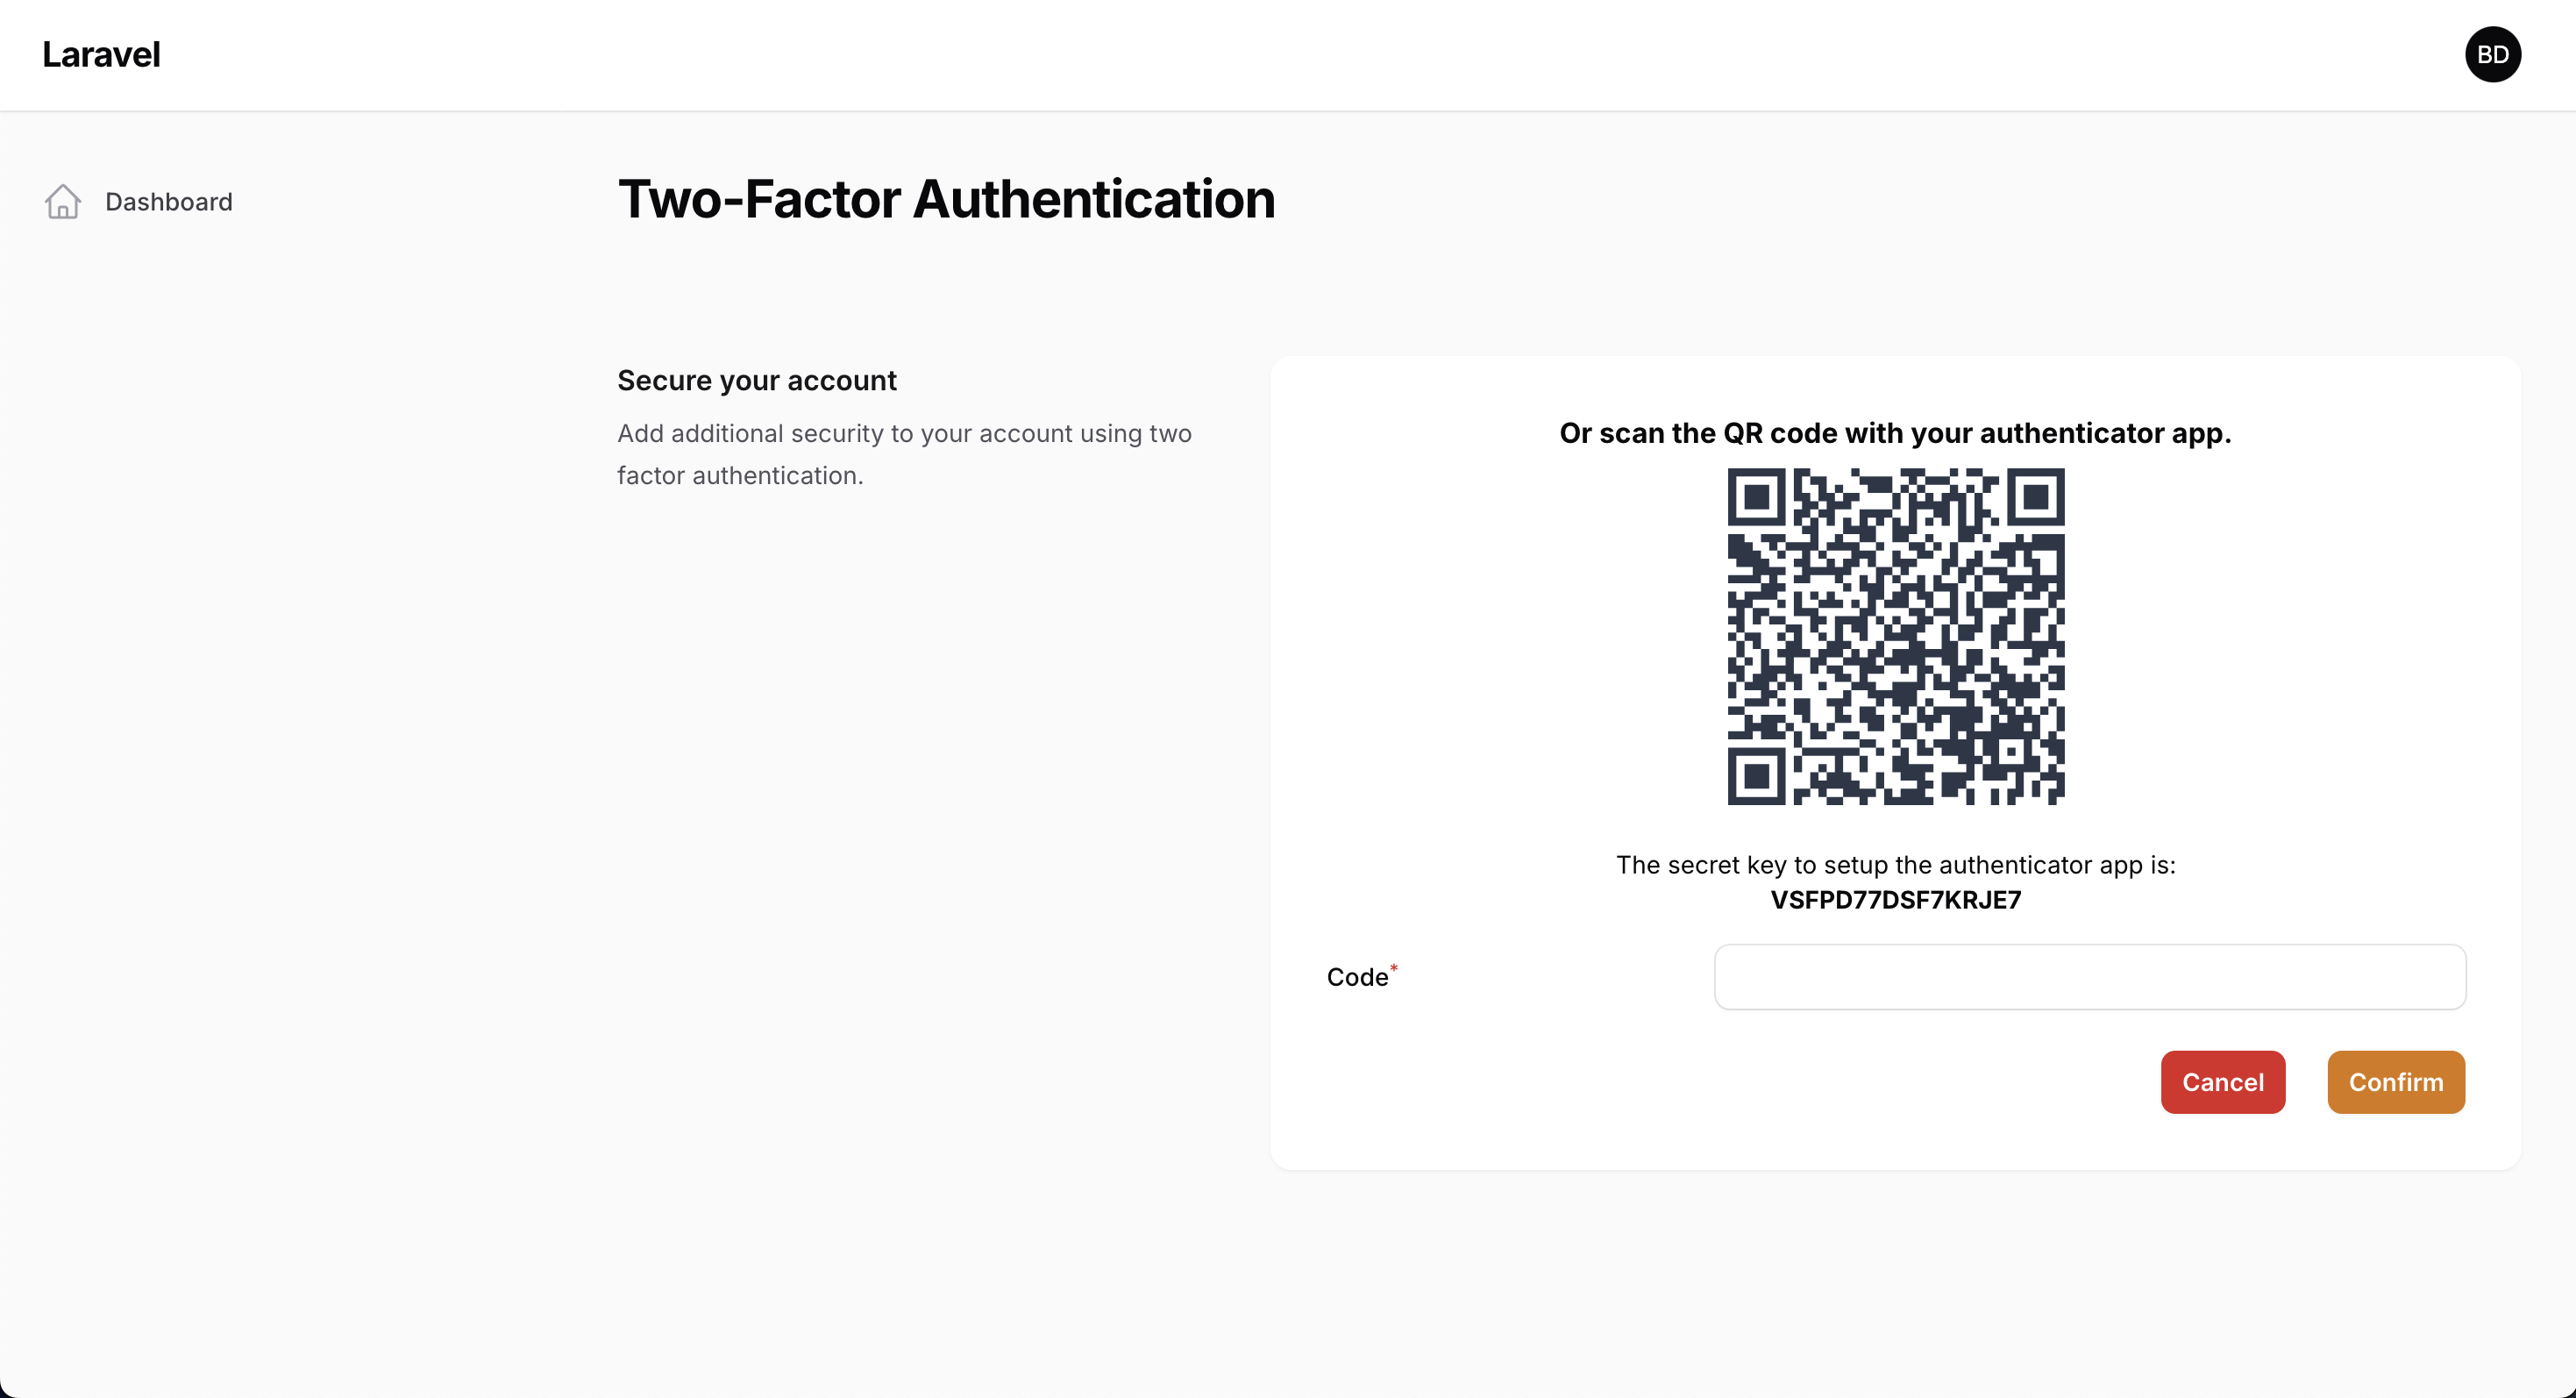
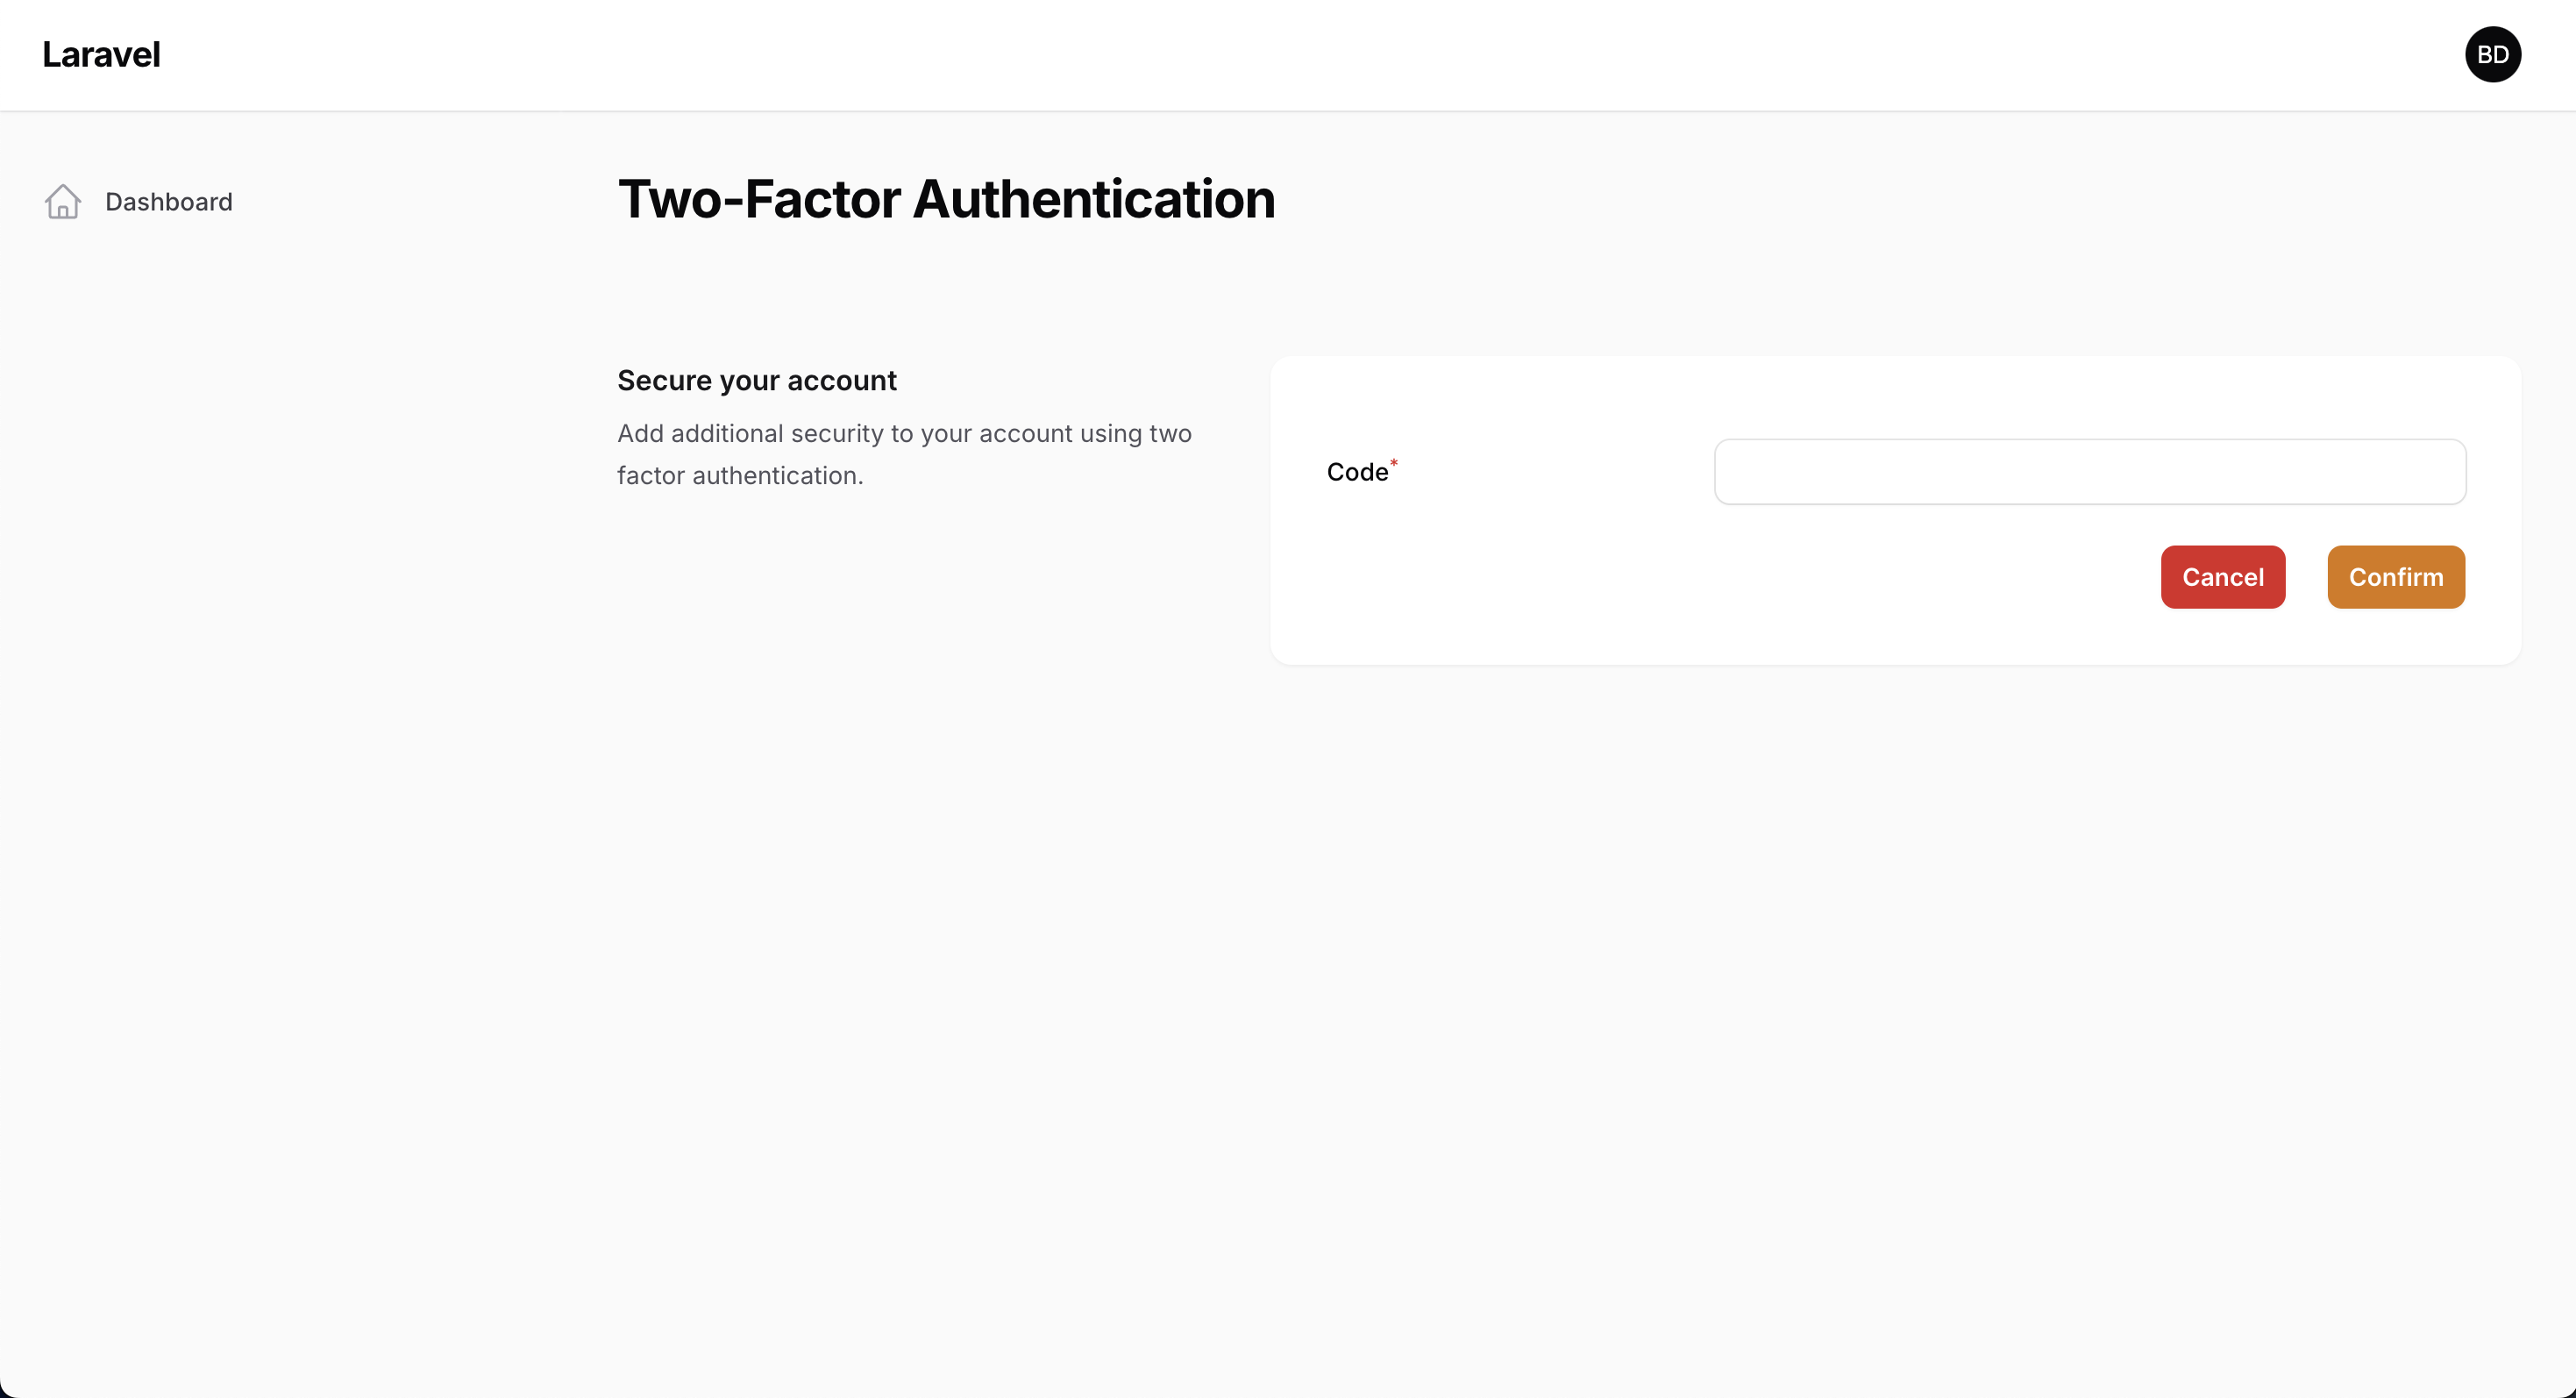
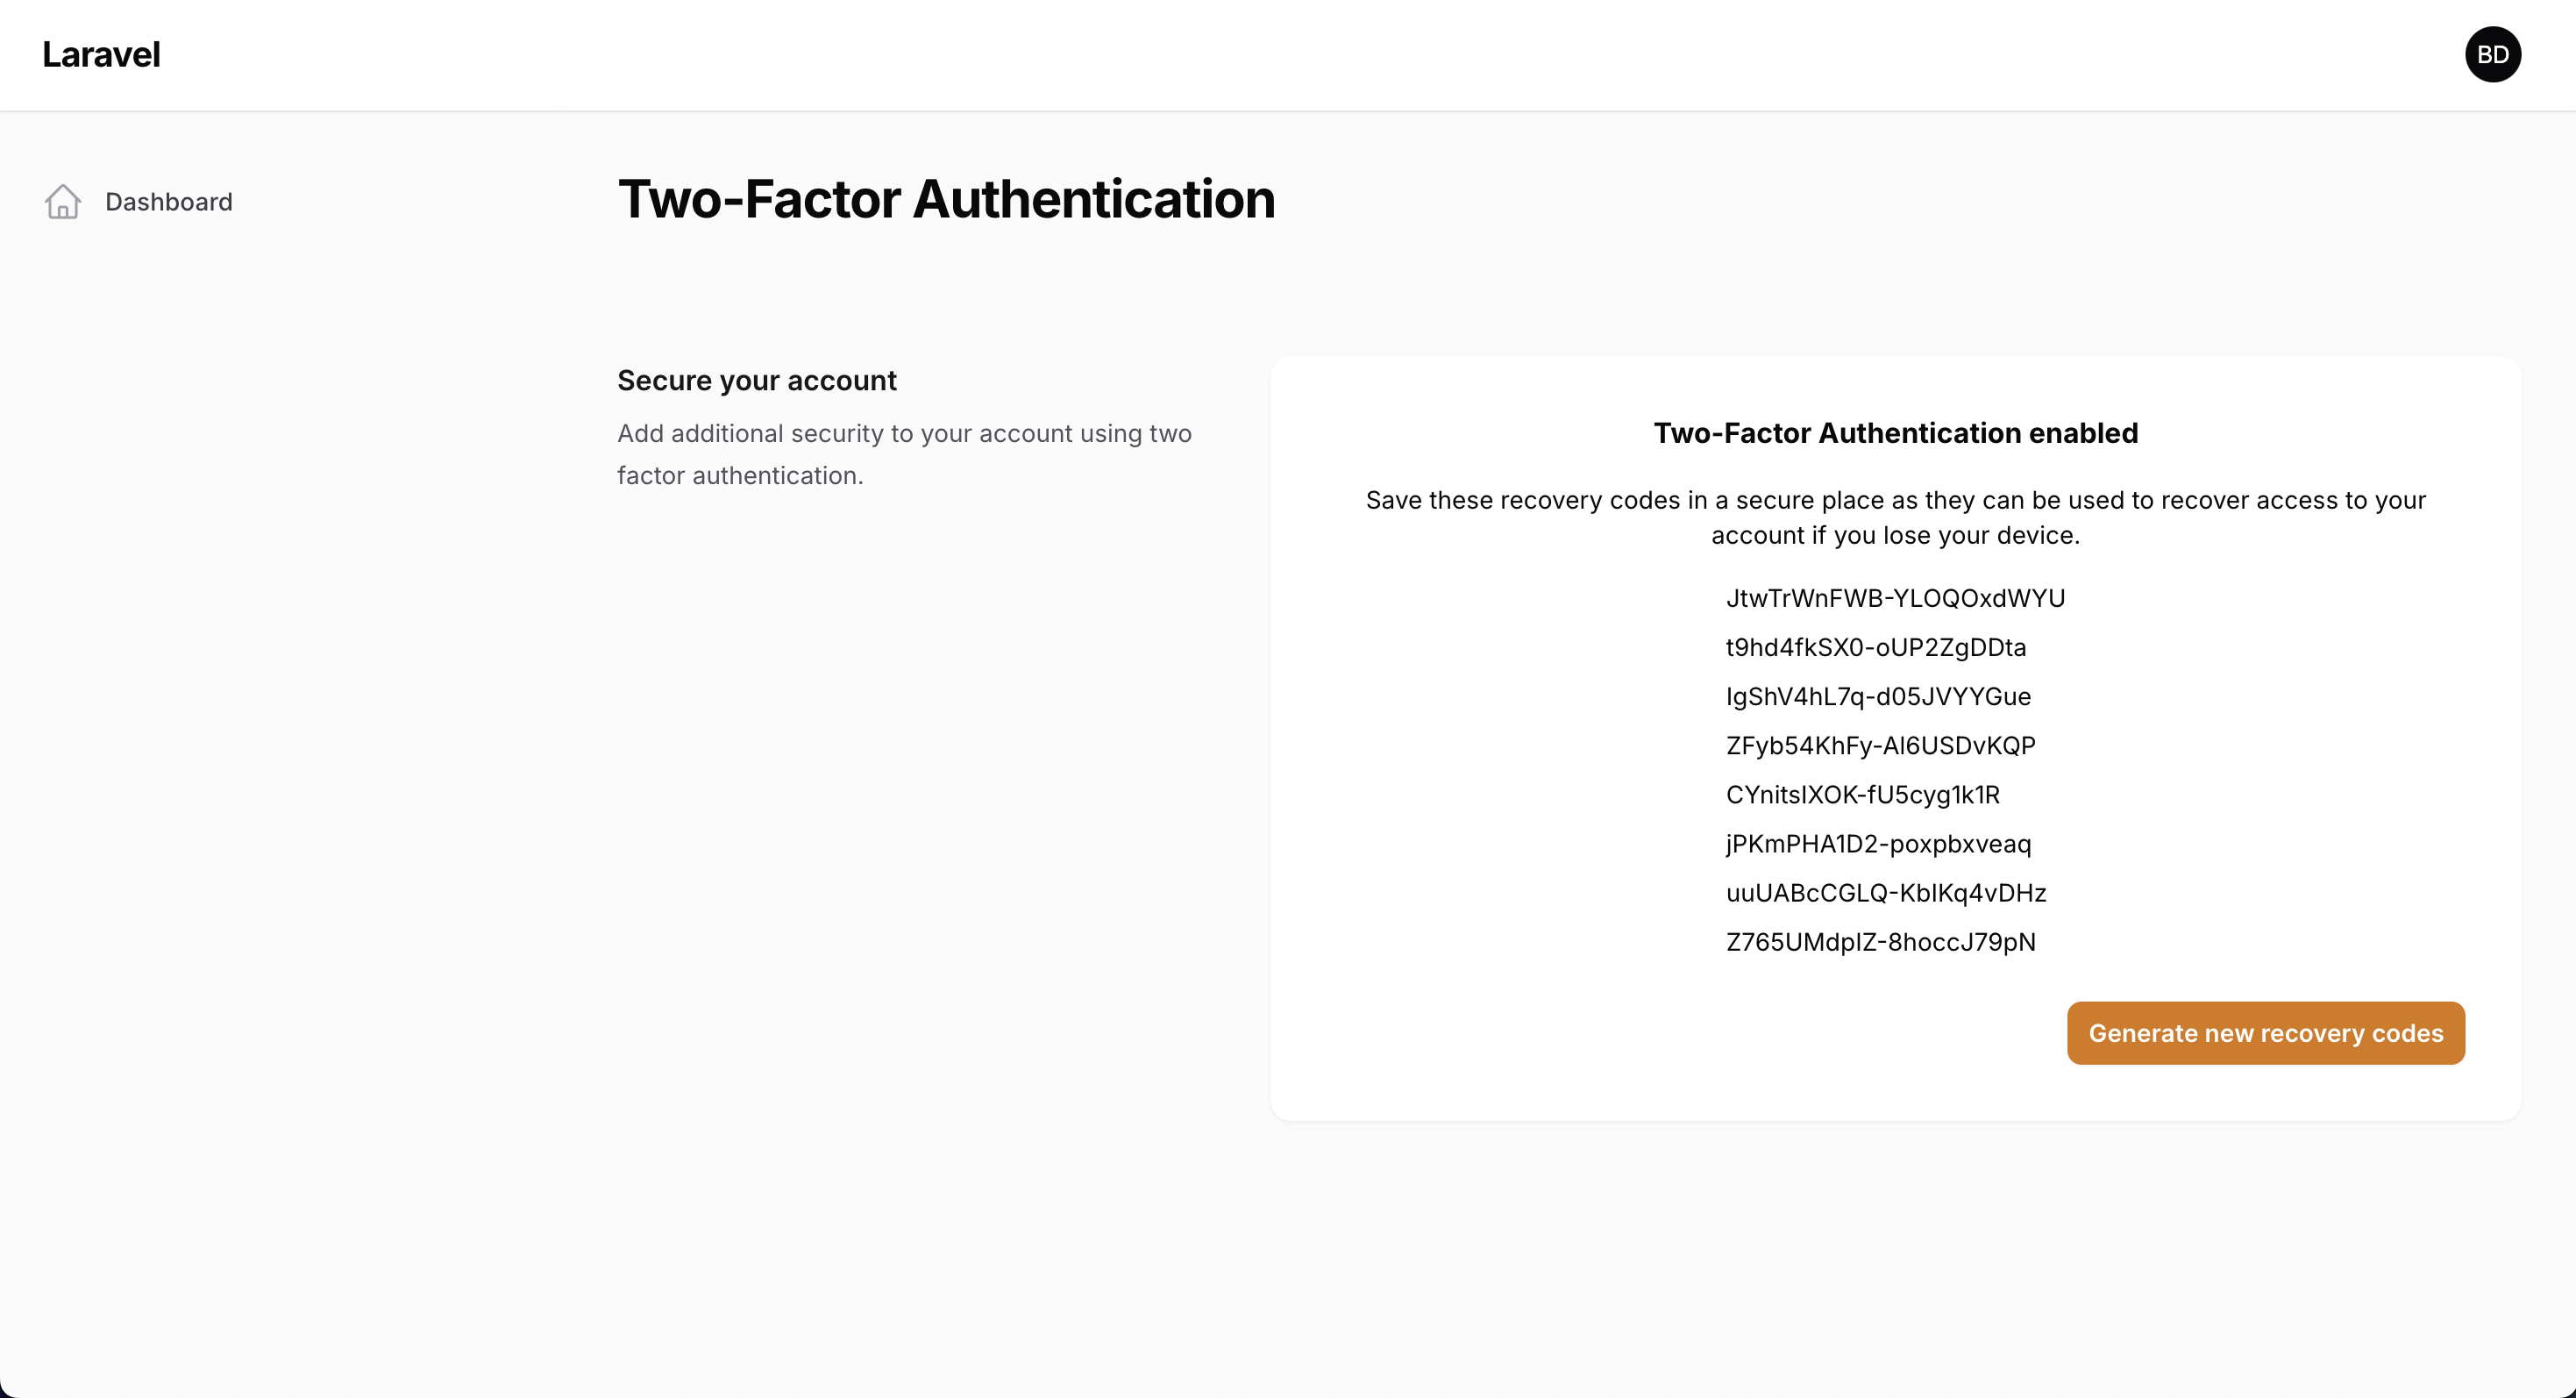
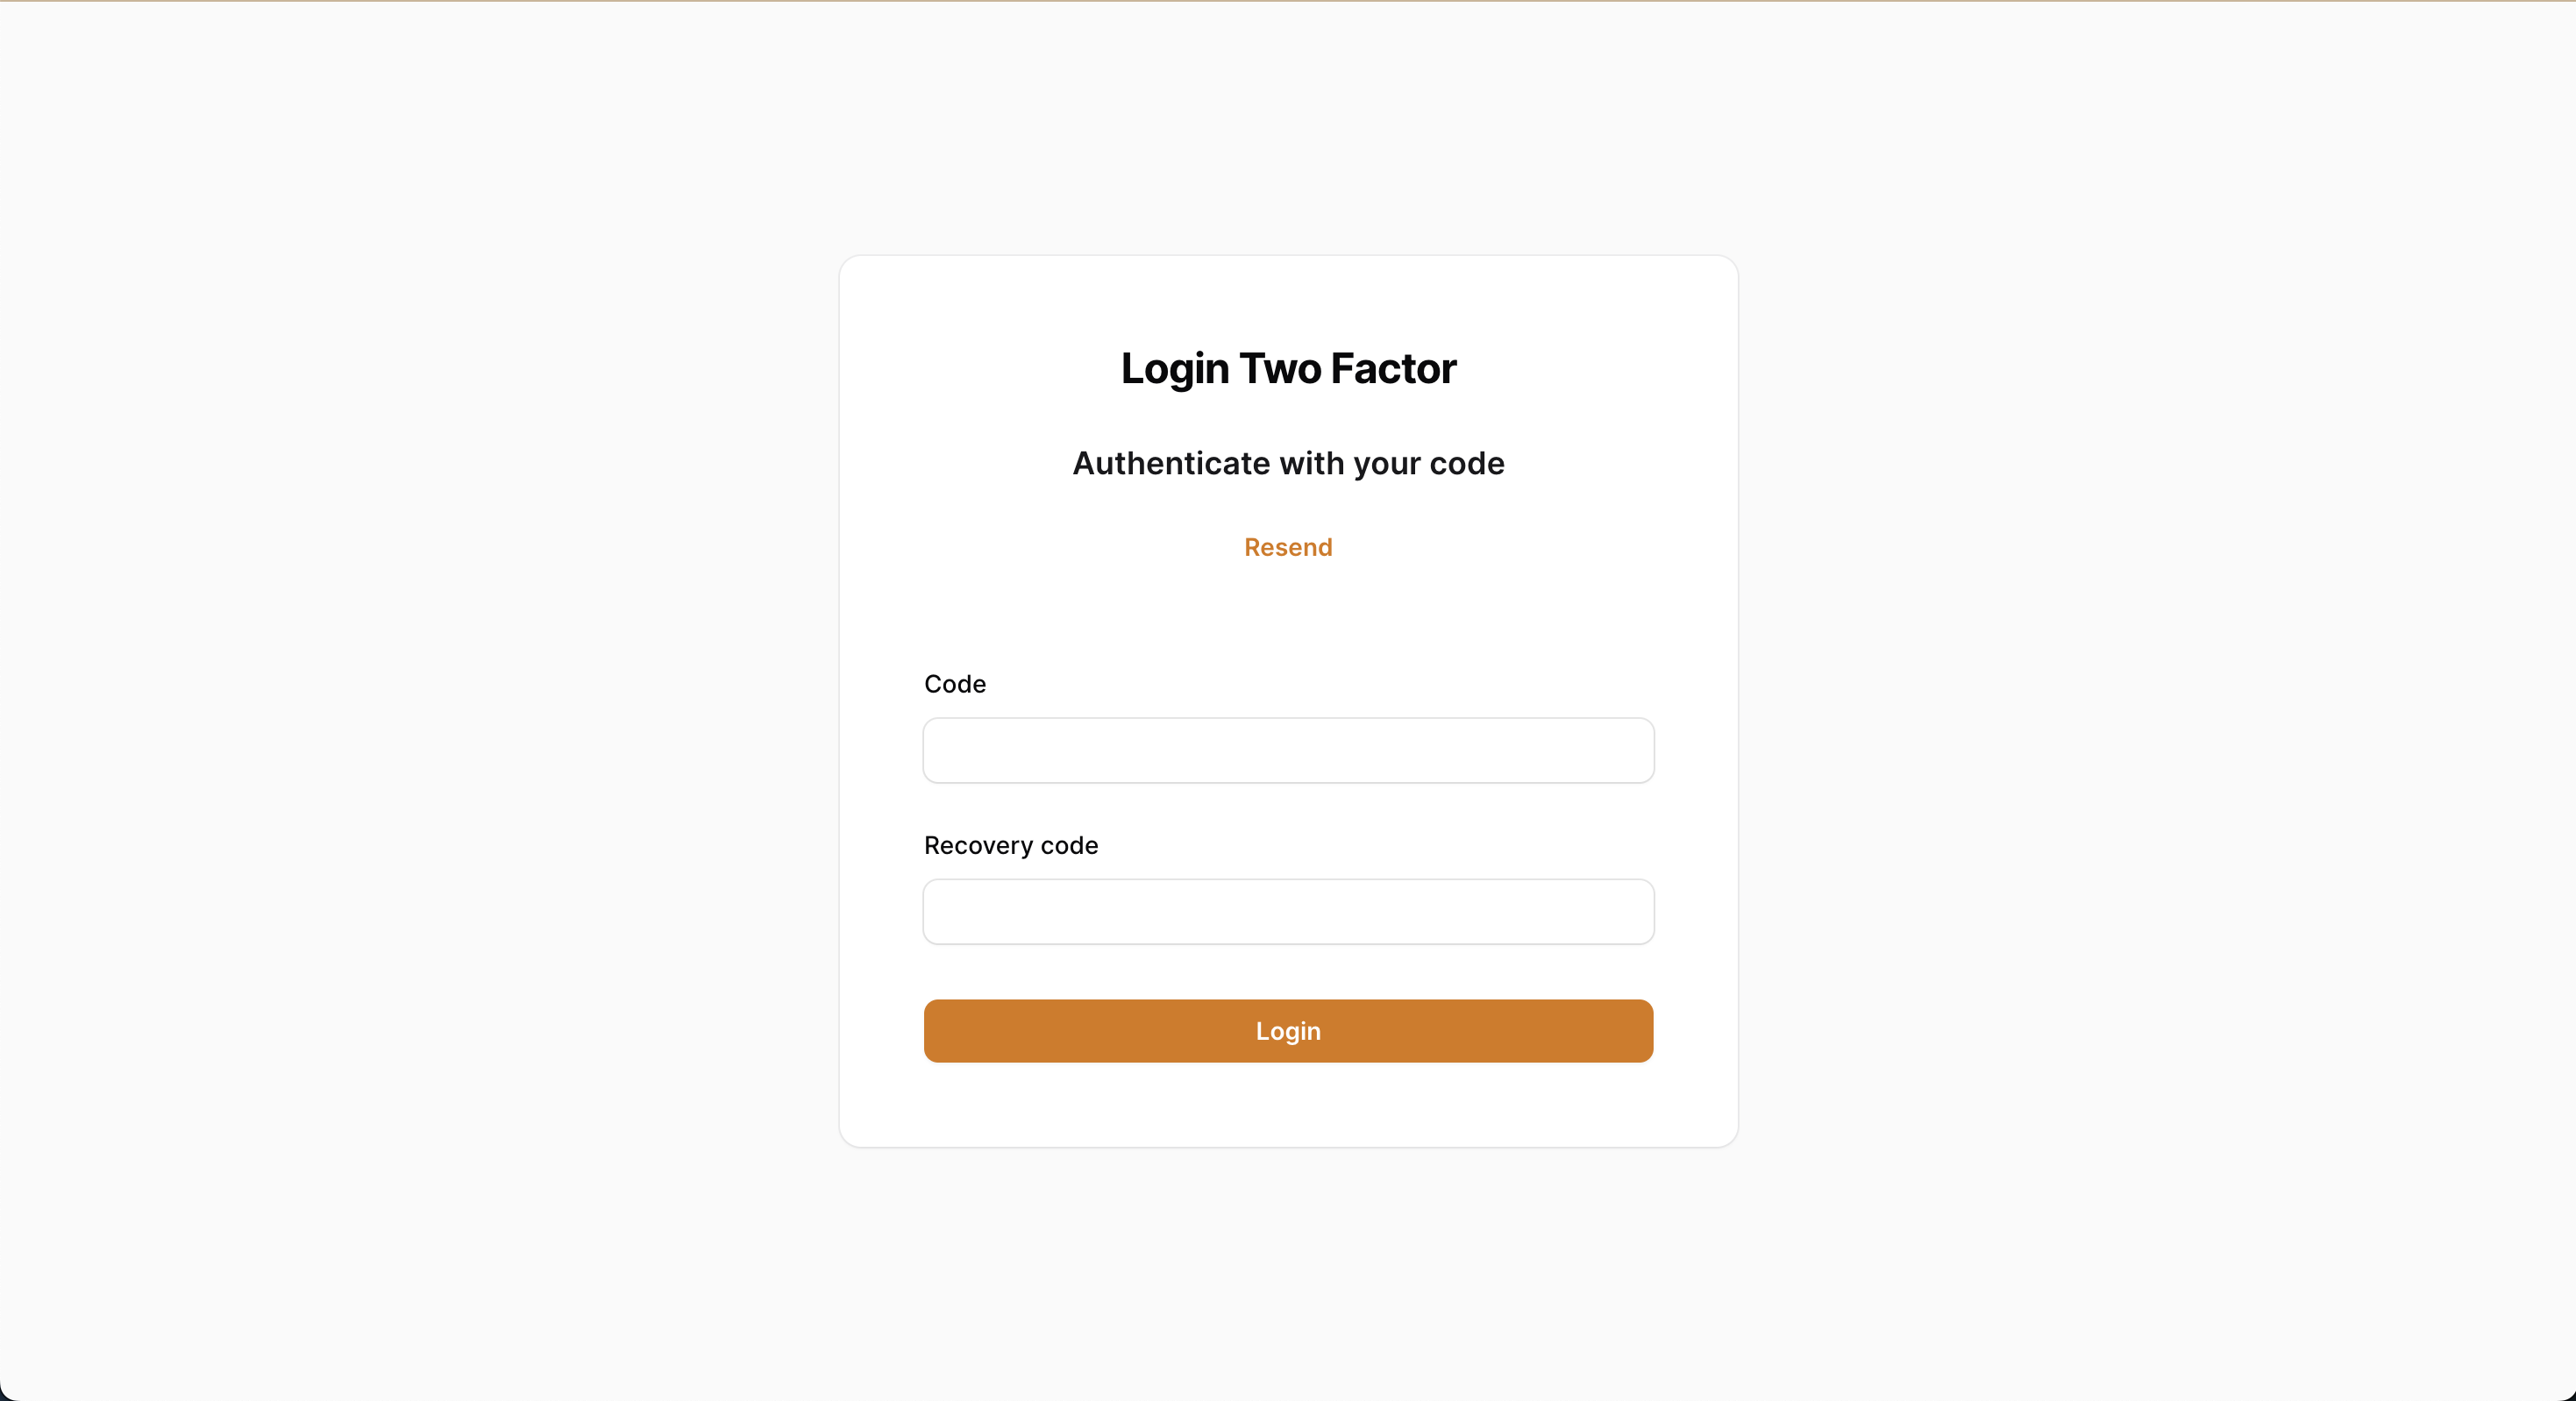
功能及截图
启用双因素认证(2FA)
使用认证器应用作为双因素方法
使用电子邮件或短信作为双因素方法
恢复码
双因素认证挑战
安装
您可以通过 composer 安装此包
composer require vormkracht10/filament-2fa
如果您还没有安装 Laravel Fortify,可以通过运行以下命令安装:
composer require laravel/fortify
php artisan fortify:install
php artisan migrate
然后,您可以通过运行以下命令轻松安装插件:
php artisan filament-two-factor-auth:install
然后,将插件添加到您的 PanelProvider
use Vormkracht10\TwoFactorAuth\TwoFactorAuthPlugin;

// ...

->plugin(TwoFactorAuthPlugin::make())
确保您的用户使用 TwoFactorAuthenticatable 特性
class User extends Authenticatable implements FilamentUser
{
    use HasApiTokens, HasFactory, Notifiable, TwoFactorAuthenticatable;
    // ...
}
还在用户模型上定义了 two_factor_type 类型转换
use Vormkracht10\TwoFactorAuth\Enums\TwoFactorType;

// ...

protected function casts(): array
{
    return [
        'two_factor_type' => TwoFactorType::class,
    ];
}
注意
当在您的模型上使用 fillable 而不是 guarded 时,请确保将 two_factor_type 添加到 $fillable 数组中。
同时,确保将包文件添加到您的 vite.config.js 文件中
// ...

export default defineConfig({
    plugins: [
        laravel({
            input: [
                // ...
            ],
            content: [
                "./vendor/vormkracht10/filament-2fa/resources/**.*.blade.php",
            ],
            refresh: true,
        }),
    ],
});
注册事件监听器
Laravel 11
如果您正在使用 Laravel 11,需要在您的 AppServiceProvider 的 boot 方法中注册事件监听器
use Laravel\Fortify\Events\TwoFactorAuthenticationChallenged;
use Laravel\Fortify\Events\TwoFactorAuthenticationEnabled;
use Vormkracht10\TwoFactorAuth\Listeners\SendTwoFactorCodeListener;

// ...

public function boot(): void
{
    Event::listen([
        TwoFactorAuthenticationChallenged::class,
        TwoFactorAuthenticationEnabled::class
    ], SendTwoFactorCodeListener::class);
}
Laravel < 11
如果您尚未使用 Laravel 11,您可能需要在您的 EventServiceProvider 中手动注册事件监听器
use Laravel\Fortify\Events\TwoFactorAuthenticationEnabled;
use Laravel\Fortify\Events\TwoFactorAuthenticationChallenged;
use Vormkracht10\TwoFactorAuth\Listeners\SendTwoFactorCodeListener;

// ...

protected $listen = [
    TwoFactorAuthenticationChallenged::class => [
        SendTwoFactorCodeListener::class,
    ],
    TwoFactorAuthenticationEnabled::class => [
        SendTwoFactorCodeListener::class,
    ],
];
如果您想自定义视图(包括电子邮件),可以使用以下命令发布它们:
php artisan vendor:publish --tag=filament-two-factor-auth-views
用法
配置
可以在 config/filament-two-factor-auth.php 文件中配置认证方法(该文件在安装命令期间发布)。
您可以简单地添加或删除(注释)您想要使用的功能
return [
    'options' => [
        TwoFactorType::authenticator,
        TwoFactorType::email,
        // TwoFactorType::phone,
    ],

    'sms_service' => null, // For example 'vonage', 'twilio', 'nexmo', etc.
    'send_otp_class' => null,
    'phone_number_field' => 'phone', // The field name of the phone number in your user model
];
如果您想使用短信方法,您需要提供一个短信服务。您可以在 Laravel Notifications 文档 中找到现成的服务。
使用 Vonage 的示例
如 Laravel 文档 中的示例,您需要在您的通知类中创建 toVonage() 方法。这就是我们建议创建一个扩展此包中的原始 SendOTP 类的定制通知类的原因
<?php

namespace App\Notifications;

use Vormkracht10\TwoFactorAuth\Notifications\SendOTP as NotificationsSendOTP;
use Illuminate\Notifications\Messages\VonageMessage;

class SendOTP extends NotificationsSendOTP
{
    /**
     * Get the Vonage / SMS representation of the notification.
     */
    public function toVonage(mixed $notifiable): VonageMessage
    {
        return (new VonageMessage)
            ->content('Your OTP is: ' . $this->getTwoFactorCode($notifiable));
    }
}
您可以通过调用通知类上的 getTwoFactorCode 方法来获取用户的双因素代码。
然后,您需要在 config/filament-two-factor-auth.php 文件中设置 send_otp_class
return [
    // ...

    'sms_service' => 'vonage',
    'send_otp_class' => App\Notifications\SendOTP::class,
];
注意
请确保您的用户或通知模型有一个 routeNotificationForVonage 方法,它返回电话号码。有关更多信息,请参阅您使用的短信服务的文档。
自定义
如果您想完全自定义页面,可以在 config/filament-two-factor-auth.php 文件中覆盖类
return [
    // ...

    'login' => Login::class,
    'register' => Register::class,
    'challenge' => LoginTwoFactor::class,
    'two_factor_settings' => TwoFactor::class,
    'password_reset' => PasswordReset::class,
    'password_confirmation' => PasswordConfirmation::class,
    'request_password_reset' => RequestPasswordReset::class,
];
确保您从包中扩展了原始类。
多租户设置
如果您在多租户环境中使用 Filament,您需要在 config/filament-two-factor-auth.php 文件中将 tenant 选项设置为 true。您还需要在您的面板配置中设置 userMenuItems。请参考以下示例
use Vormkracht10\TwoFactorAuth\Pages\TwoFactor;

// ...

->userMenuItems([
    // ...
    'two-factor-authentication' => MenuItem::make()
        ->icon('heroicon-o-lock-closed')
        ->label(__('Two-Factor Authentication'))
        ->url(fn(): string => TwoFactor::getUrl(['tenant' => auth()->user()->organization->getRouteKey()])),
])
强制两步验证
如果您想强制用户启用两步验证,您可以在 PanelProvider 中添加以下代码
->plugins([
    TwoFactorAuthPlugin::make()->forced(),
])
注意
当您使用 forced 方法时,确保在多租户设置中使用 filament-two-factor-auth.php 配置文件将 multi_tenancy 选项设置为 true。否则,强制设置将不起作用。我们无法在 PanelProvider 中检查租户,因为用户尚未认证。
自定义强制消息
如果您想自定义强制消息,您可以发布语言文件
php artisan vendor:publish --tag="filament-two-factor-auth-translations"
然后您可以在 lang/vendor/filament-two-factor-auth/en.json 文件中自定义消息。您应该更改以下键
{
    "Your administrator requires you to enable two-factor authentication.": "Your custom message here.",
    "Two-Factor Authentication mandatory": "Your custom title here."
}
测试
composer test
变更日志
有关最近更改的更多信息,请参阅 变更日志
贡献
有关详细信息,请参阅 贡献指南
安全漏洞
有关如何报告安全漏洞的详细信息,请参阅 我们的安全策略
鸣谢
许可
MIT 许可证(MIT)。有关更多信息,请参阅 许可文件