tentwentyfour / blockdiag-mediawiki-extension
MediaWiki 的 Blockdiag 包装器
1.1.0
2016-08-28 13:15 UTC
Requires
- php: >=5.4
- composer/installers: ~1.0
Requires (Dev)
- phpspec/phpspec: ~2.0
- squizlabs/php_codesniffer: ~1.5
This package is not auto-updated.
Last update: 2024-09-14 17:32:04 UTC
README
从版本 1.1.0 开始,此扩展提供两项服务
- 一个 ParserHook,用于手动指定 blockdiag DSL 时使用
- 一个 ResultPrinter,用于 SemanticMediaWiki。(目前此功能仅支持
nwdiag格式。)
要求
- blockdiag(以及 seqdiag、actdiag、nwdiag)
- mediawiki >= 1.25.0
安装
- 只需在您的 mediawiki doc-root 内运行以下命令
$ composer require tentwentyfour/blockdiag-mediawiki-extension
- 然后,将此行添加到您的 LocalSettings.php 文件的末尾
wfLoadExtension('BlockdiagMediawiki');
- (可选)如果您在默认位置之外安装了 blockdiag 包,您可能需要告诉插件如何找到这些二进制文件
$wgBlockdiagPath = '/usr/bin/'; // default is /usr/local/bin/
使用 ParserHook
<blockdiag>
{
    A -> B -> C
         B -> D -> E
}
</blockdiag>
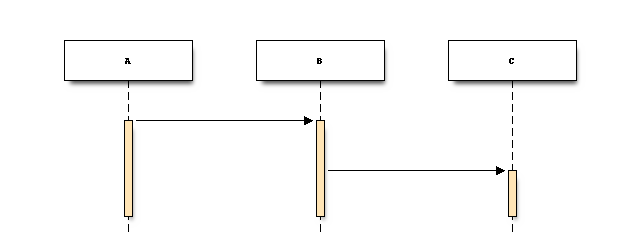
如果您想使用其他 *diag 工具,只需在开头的括号“{”之前指定它们的名称,例如 seqdiag { 或 nwdiag {。
<blockdiag>
seqdiag {
    A -> B;
         B -> C;
}
</blockdiag>
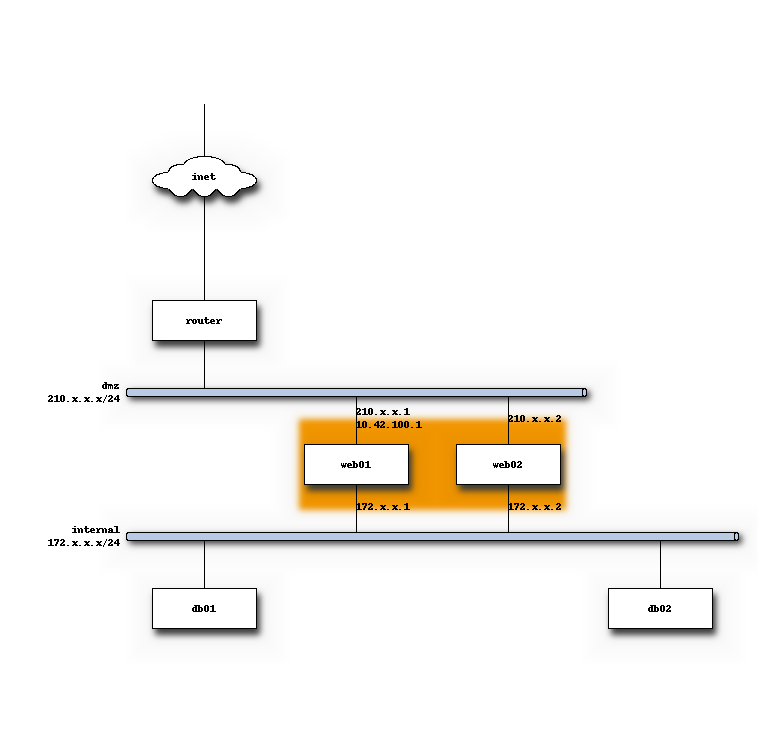
<blockdiag>
nwdiag {
inet [shape = cloud];
inet -- router;
network dmz {
      router;
      address = "210.x.x.x/24"
      group web {
          web01 [address = "210.x.x.1, 10.42.100.1"];
          web02 [address = "210.x.x.2"];
      }
  }
  network internal {
      address = "172.x.x.x/24";

      web01 [address = "172.x.x.1"];
      web02 [address = "172.x.x.2"];
      db01;
      db02;
  }
}
</blockdiag>
请注意,Blockdiag 扩展将缓存您的图像,以便在每次页面加载时无需重新渲染。如果您需要重新渲染您的图表,您需要刷新或编辑页面,或者禁用页面的缓存。
使用 Semantic Result Printer
如果您已安装 Semantic Mediawiki,您还可以将其用作结果打印机,直接从您的语义查询生成图表。
要求
模板
以下模板仅作为示例,仅提供结果打印机提供合理结果所需的最小属性集。请注意,您可以按需调整样式和属性,只要您确保您的 {{#ask:}} 查询返回选定节点的 IP 地址和完全限定域名(fqdn)。
我们省略了表单和属性详情。Semantic Forms 将简化您创建服务器和隧道条目的过程。
服务器模板
<onlyinclude>
{| class="wikitable" style="width: 30em; font-size: 90%; border: 1px solid #aaaaaa; background-color: #f9f9f9; color: black; margin-bottom: 0.5em; margin-left: 1em; padding: 0.2em; float: right; clear: right; text-align:left;"
! style="text-align: left; background-color:#ccccff;" colspan="2" |<big>{{PAGENAME}}</big>
|-
! Fully Qualified Domain Name:
| [[Has fqdn::{{{fqdn|}}}]]
|-
! Tunneled IPs:
| {{{tipv4|}}} {{{tipv6|}}}
|-
! Uses VPN tunnel:
| {{#arraymap:{{{tunnel|}}}|,|x|[[Uses VPN tunnel::x]]}}
|}
<includeonly>
{{#set:
Has tunnel IPv4={{{tipv4|}}}
}}
[[Category:Server]]</includeonly></onlyinclude>
隧道模板
<includeonly>{| class="wikitable"
! colspan="2" | {{PAGENAME}}
|-
! Purpose
|  [[Has purpose::{{{purpose|}}}]]
|-
! Subnet
|  [[Has subnet::{{{subnet|}}}]]
|-
! Server
|  [[Has server::{{{server|}}}]]
|-
! Port
|  [[Has VPN port::{{{port|}}}]]
|-
! Hosts connected through this tunnel
| {{#ask:[[Uses VPN tunnel::{{SUBJECTPAGENAME}}]]|format=list|?Has tunnel IPv4=}}
|}
[[Category:Tunnel]]
</includeonly>
示例查询
例如,在名为您的 OpenVPN 配置之一的页面中,您可以使用以下查询
{{#ask:
 [[Uses VPN tunnel::{{PAGENAME}}]]
 |format=nwdiag
 |domain=servers.mydomain.tld
 |gateway=gateway.hypervisor
 |sort=Has tunnel IPv4
 |?Has tunnel IPv4=ipv4
 |?Has fqdn=fqdn
}}
gateway 参数是可选的。


