diecoding / yii2-telegram-bot
Yii2 Telegram Bot Api 组件
Requires
- php: >=7.2
- longman/telegram-bot: ^0.75.0
- yiisoft/yii2: ~2.0.14
Requires (Dev)
- phpunit/phpunit: <7
This package is auto-updated.
Last update: 2024-09-23 11:49:10 UTC
README
Yii2 Telegram Bot
Yii2 Telegram Bot Api 组件
创建您的第一个机器人
-
向 @botfather 发送以下文本 https://telegram.me/botfather:
/newbot如果您不知道如何通过用户名发送消息,请点击您的 Telegram 应用中的搜索字段,并输入@botfather,您应该能够开始对话。注意不要发送给错误联系人,因为有些用户的用户名与botfather相似。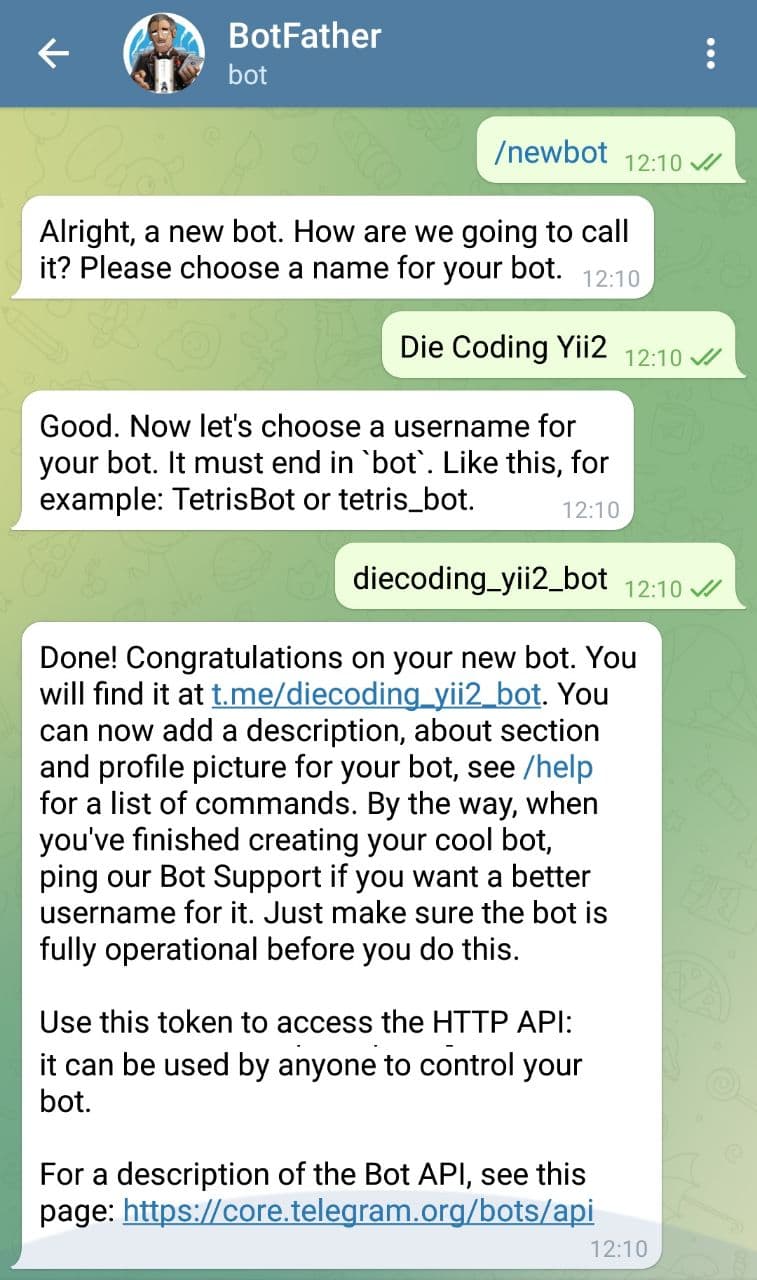
-
@botfather 回复
Alright, a new bot. How are we going to call it? Please choose a name for your bot.。 -
输入您想为您的机器人选择的任何名称。
-
@botfather 回复
Good. Now let's choose a username for your bot. It must end in `bot`. Like this, for example: TetrisBot or tetris_bot.。 -
输入您想为您的机器人选择的任何用户名,最小长度为 5 个字符,并以 bot 结尾。例如:
diecoding_yii2_bot。 -
@botfather 回复
Done! Congratulations on your new bot. You will find it at t.me/diecoding_yii2_bot. You can now add a description, about section and profile picture for your bot, see /help for a list of commands. By the way, when you've finished creating your cool bot, ping our Bot Support if you want a better username for it. Just make sure the bot is fully operational before you do this. Use this token to access the HTTP API: 5162536695:AAGdvgUMbNmTlL8sNW-SZHs32iHnTblPqEM Keep your token secure and store it safely, it can be used by anyone to control your bot. For a description of the Bot API, see this page: https://core.telegram.org/bots/api -
记下上面提到的 'token'。
-
向 @botfather 输入
/setprivacy。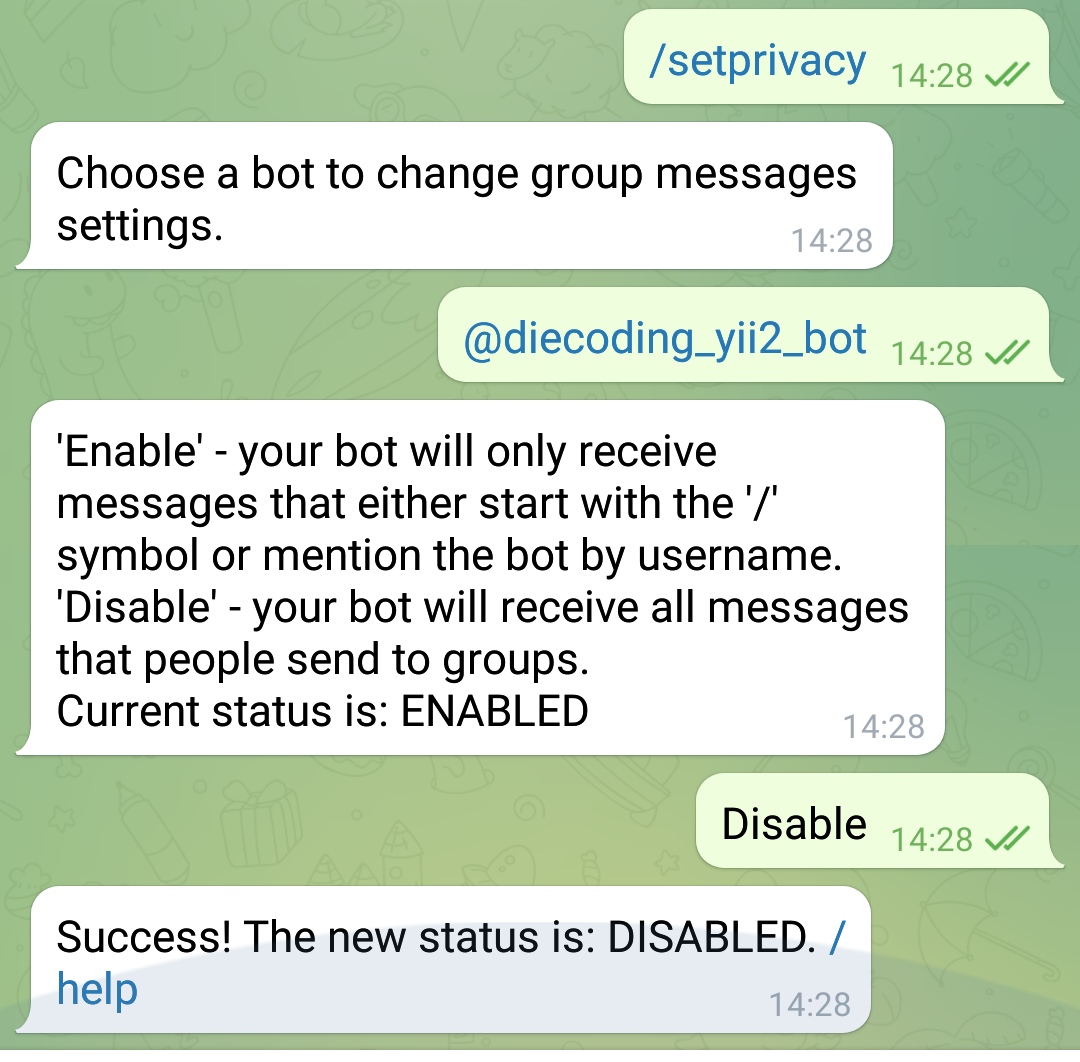
-
@botfather 回复
Choose a bot to change group messages settings.。 -
输入或选择 @PostMan_bot(将步骤 5 上设置的名称更改为用户名,但以 @ 开头)
-
@botfather 回复。
'Enable' - your bot will only receive messages that either start with the '/' symbol or mention the bot by username. 'Disable' - your bot will receive all messages that people send to groups. Current status is: ENABLED -
输入或选择
Disable以让您的机器人接收发送到群组的所有消息。实际上这一步由您自己决定。 -
@botfather 回复
Success! The new status is: DISABLED. /help。


安装
安装此扩展的首选方式是通过 composer。
运行
composer require diecoding/yii2-telegram-bot "@dev"
或添加
"diecoding/yii2-telegram-bot": "@dev"
到您的 composer.json 文件的 require 部分中。
可用方法列表
列出方法
getMe
sendMessage
forwardMessage
sendPhoto
sendAudio
sendDocument
sendSticker
sendVideo
sendLocation
sendChatAction
getUserProfilePhotos
getUpdates
setWebhook
getChat
getChatAdministrators
getChatMembersCount
getChatMember
answerCallbackQuery
editMessageText
editMessageCaption
sendGame
Game
Animation
CallbackGame
getGameHighScores
GameHighScore
answerInlineQuery
setChatStickerSet
deleteChatStickerSet
leaveChat
pinChatMessage
unpinChatMessage
setChatDescription
setChatTitle
deleteChatPhoto
exportChatInviteLink
promoteChatMember
restrictChatMember
unbanChatMember
kickChatMember
editMessageLiveLocation
stopMessageLiveLocation
迁移表
php yii migrate --migrationPath=@vendor/diecoding/yii2-telegram-bot/src/migrations
用法
首先添加到 config.php
<?php
'components' => [
    'telegram' => [
        'class' => 'diecoding\telegram\Telegram',
        'botToken' => '5162536695:AAGdvgUMbNmTlL8sNW-SZHs32iHnTblPqEM',
        'botUsername' => 'diecoding_yii2_bot',
    ]
]
?>
一旦安装了扩展,您只需在代码中使用它即可
<?php Yii::$app->telegram->sendMessage([
	'chat_id' => $chat_id,
	'text' => 'test',
]); ?>
通过
<?php Yii::$app->telegram->sendMessage([
        'chat_id' => $chat_id,
        'text' => 'this is test',
        'reply_markup' => json_encode([
            'inline_keyboard'=>[
                [
                    [
                        'text' => 'refresh',
                        'callback_data' => time(),
                    ]
                ]
            ]
        ]),
    ]); ?>
发送照片
<?php
Yii::$app->telegram->sendPhoto([
	'chat_id' => $chat_id,
	'photo' => Yii::$app->getBaseUrl() . '/uploads/test.jpg',
	'caption' => 'this is test'
]); ?>
在控制器中使用
首先您需要禁用控制器中的 enableCsrfValidation 功能
机器人当前在您的服务器上运行。但是当我们从移动端的 Telegram 应用程序中启动 /start 时,请求不会到达控制器中的操作,因为 Telegram 将请求发送到 POST,而 yii 请求时没有 csrf 发送 Bad Request (# 400)。因此代码不会在您的方法中运行。
考虑以下示例
class SiteController extends Controller
{
	public $enableCsrfValidation = false;

	public function actionIndex()
    {
        $res = Yii::$app->telegram->sendMessage([
            'chat_id' => $chat_id,
            'text' => 'hello world!!'
        ]);

    }
}
示例代码
如何从机器人获取用户 chat_id?
您可以使用
$telegram->input->message->chat->id来获取 chat_id
示例小部件类
$res = Yii::$app->telegram->sendMessage([
	'chat_id' => $telegram->input->message->chat->id,
	'text' => "salam"
]);
新特性:命令
如何使用命令
use diecoding\telegram\base\Command;

Command::run("/start", function($telegram){
   $result = $telegram->sendMessage([
      'chat_id' => $telegram->input->message->chat->id,
      "text" => "hello"
   ]);
});